2. 在 parent 项目下引入 spring boot 的代码
打开 parent 项目中的 pom.xml
<parent>
<groupId>org.springframework.boot</groupId>
<artifactId>spring-boot-starter-parent</artifactId>
<version>2.1.9.RELEASE</version>
</parent>
这里使用的是 2.1.9 版本。
该代码的存放位置如下图所示
3. 加入 spring 的启动信息
添加上启动信息,如下图所示:
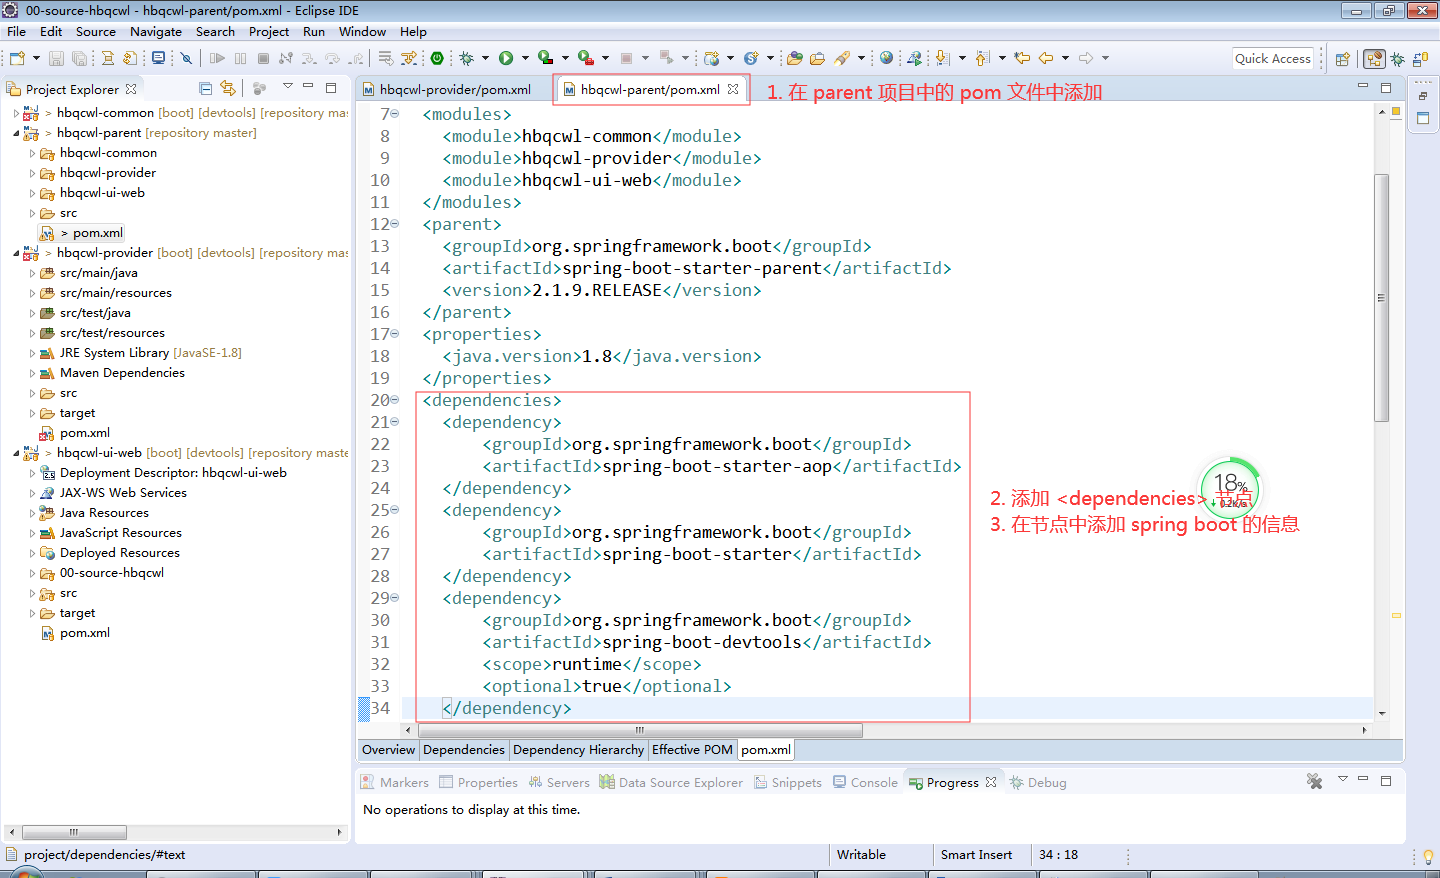
具体代码如下:
<dependency>
<groupId>org.springframework.boot</groupId>
<artifactId>spring-boot-starter-aop</artifactId>
</dependency>
<dependency>
<groupId>org.springframework.boot</groupId>
<artifactId>spring-boot-starter</artifactId>
</dependency>
<dependency>
<groupId>org.springframework.boot</groupId>
<artifactId>spring-boot-devtools</artifactId>
<scope>runtime</scope>
<optional>true</optional>
</dependency>
上面的代码一定要放到
<dependencies>
</dependencies>
这个块中,注意,这个结尾带 s 的。
4. 下载 jar 包
添加完成后,按 ctrl+s 保存,这里 eclipse 会下载需要的 jar 包
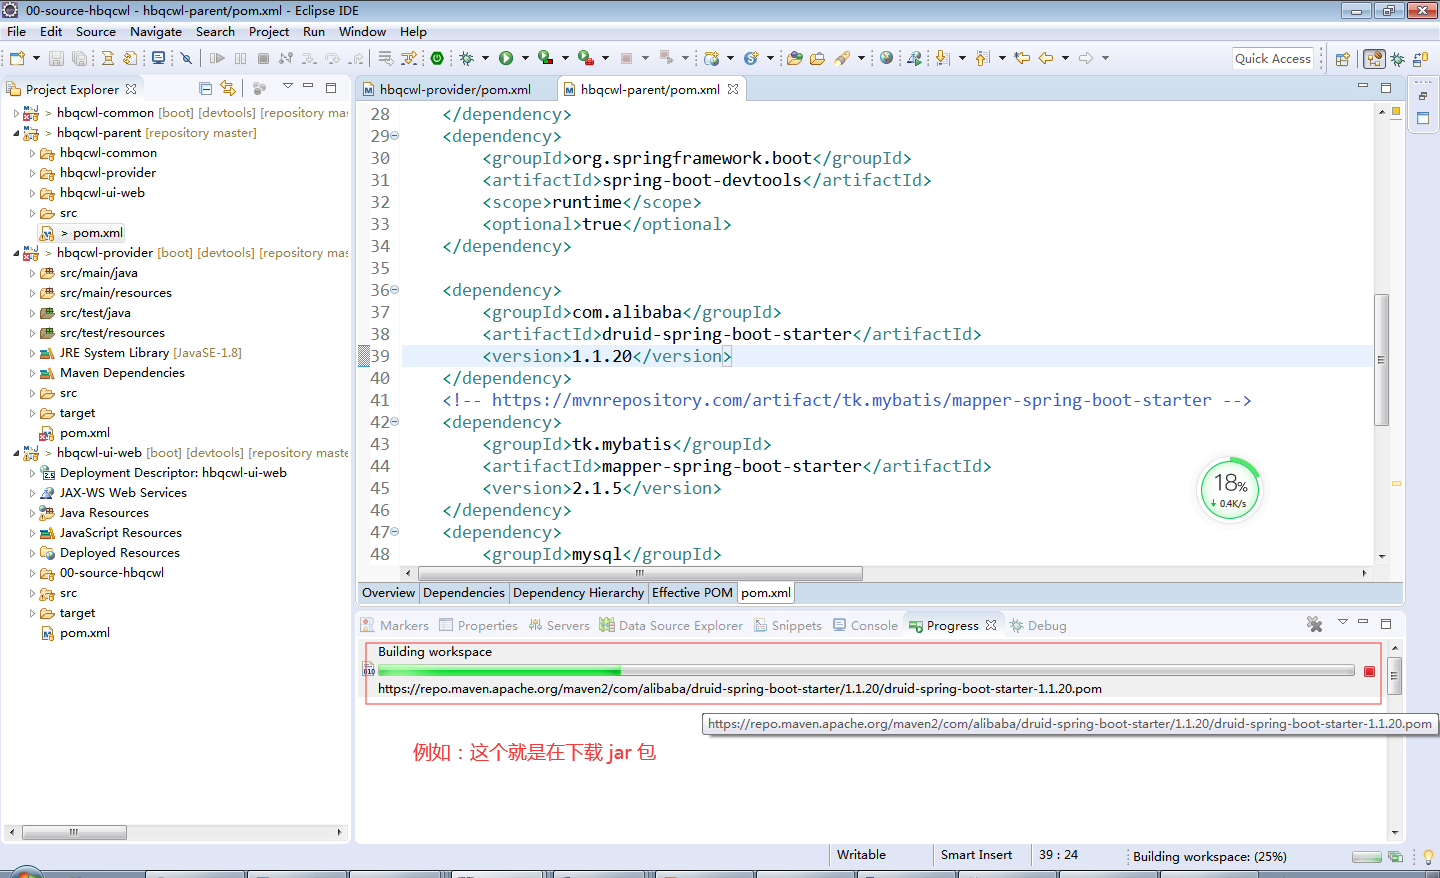
上面是从 maven 仓库中下载,也可以修改 maven ,从阿里云的仓库下载。
具体如何修改maven从阿里云下载,会单独介绍。
5. 配置 web ui 的 pom 文件
这里单独修改 ui-web 项目,因为这个需要tomcat ,所以只修改这个就行了。
添加下面的代码到 pom.xml 中,添加位置如图所示:

需添加的代码:
<dependency>
<groupId>org.springframework.boot</groupId>
<artifactId>spring-boot-starter-web</artifactId>
</dependency>
<dependency>
<groupId>org.springframework.boot</groupId>
<artifactId>spring-boot-starter-tomcat</artifactId>
<scope>provided</scope>
</dependency>
因为要使用 thymeleaf 模板引擎,所以再添加 thymeleaf 的配置
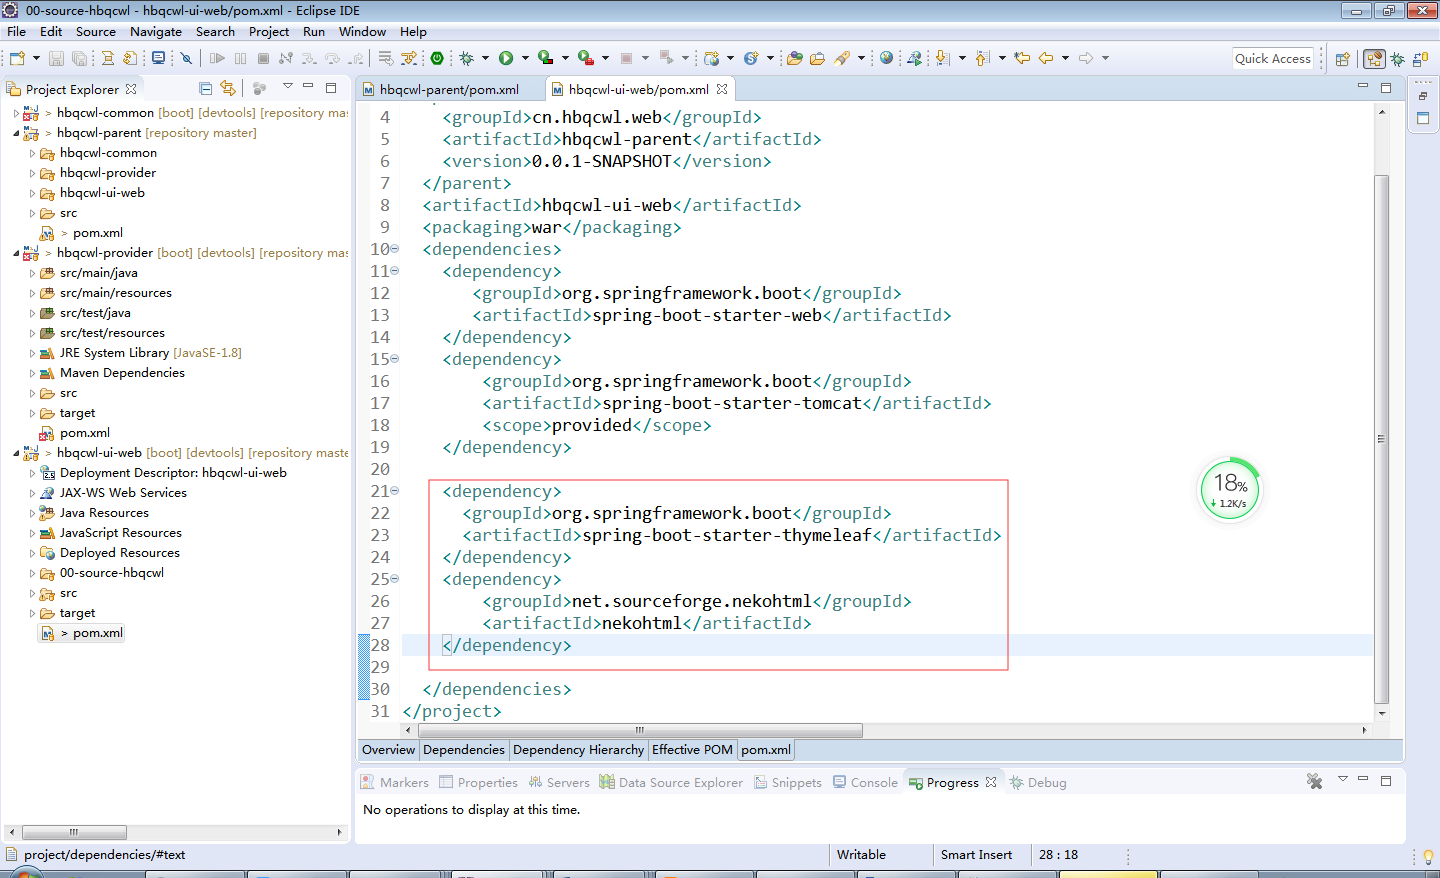
thymeleaf 是一个 java 的模板引擎,和 jsp 一样, jsp也是模板引擎
<dependency>
<groupId>org.springframework.boot</groupId>
<artifactId>spring-boot-starter-thymeleaf</artifactId>
</dependency>
<dependency>
<groupId>net.sourceforge.nekohtml</groupId>
<artifactId>nekohtml</artifactId>
</dependency>
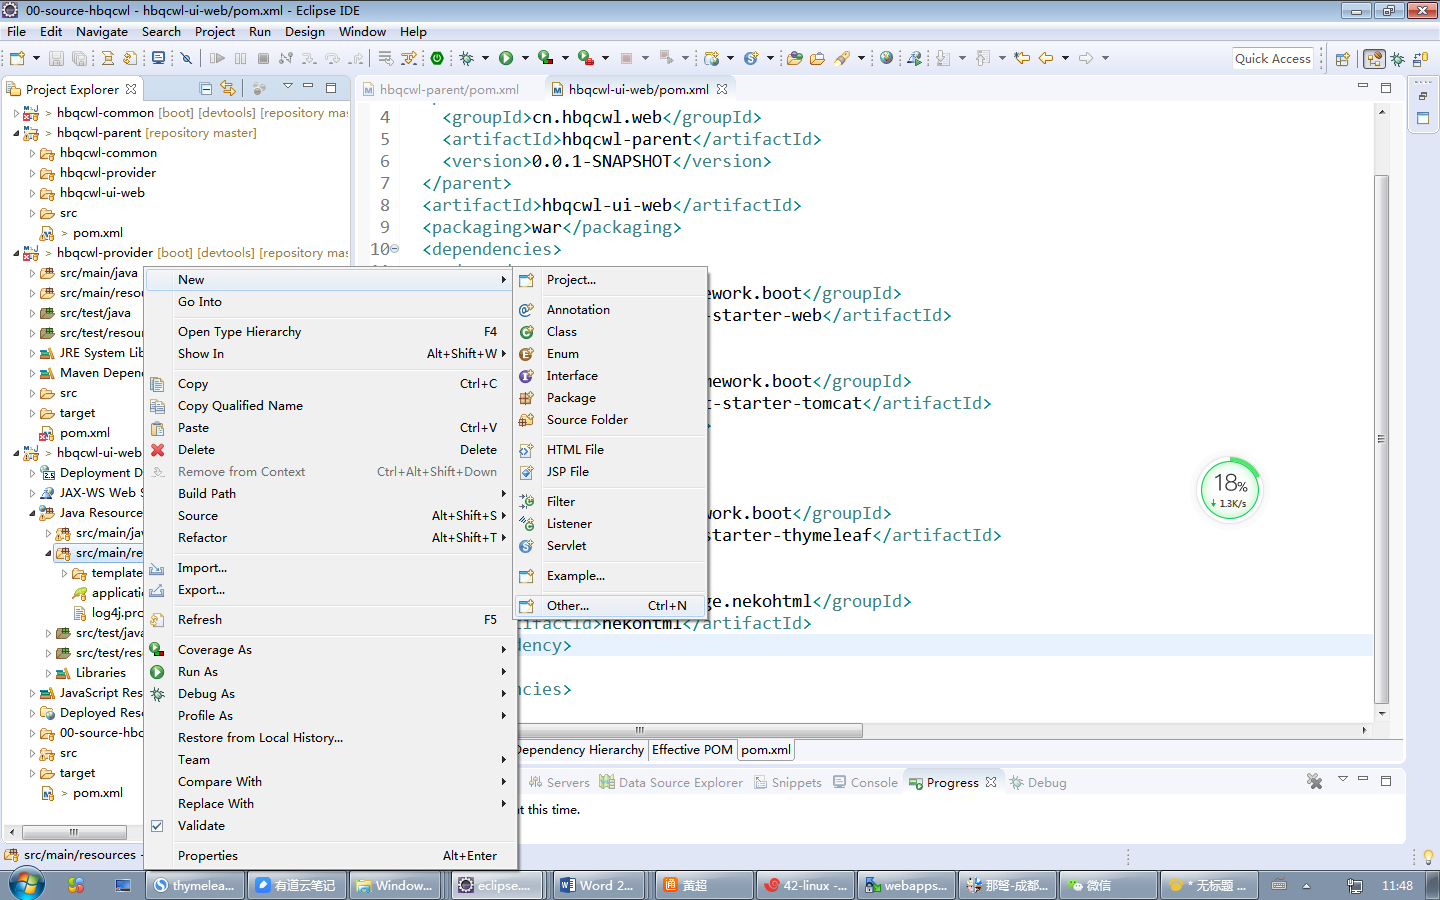
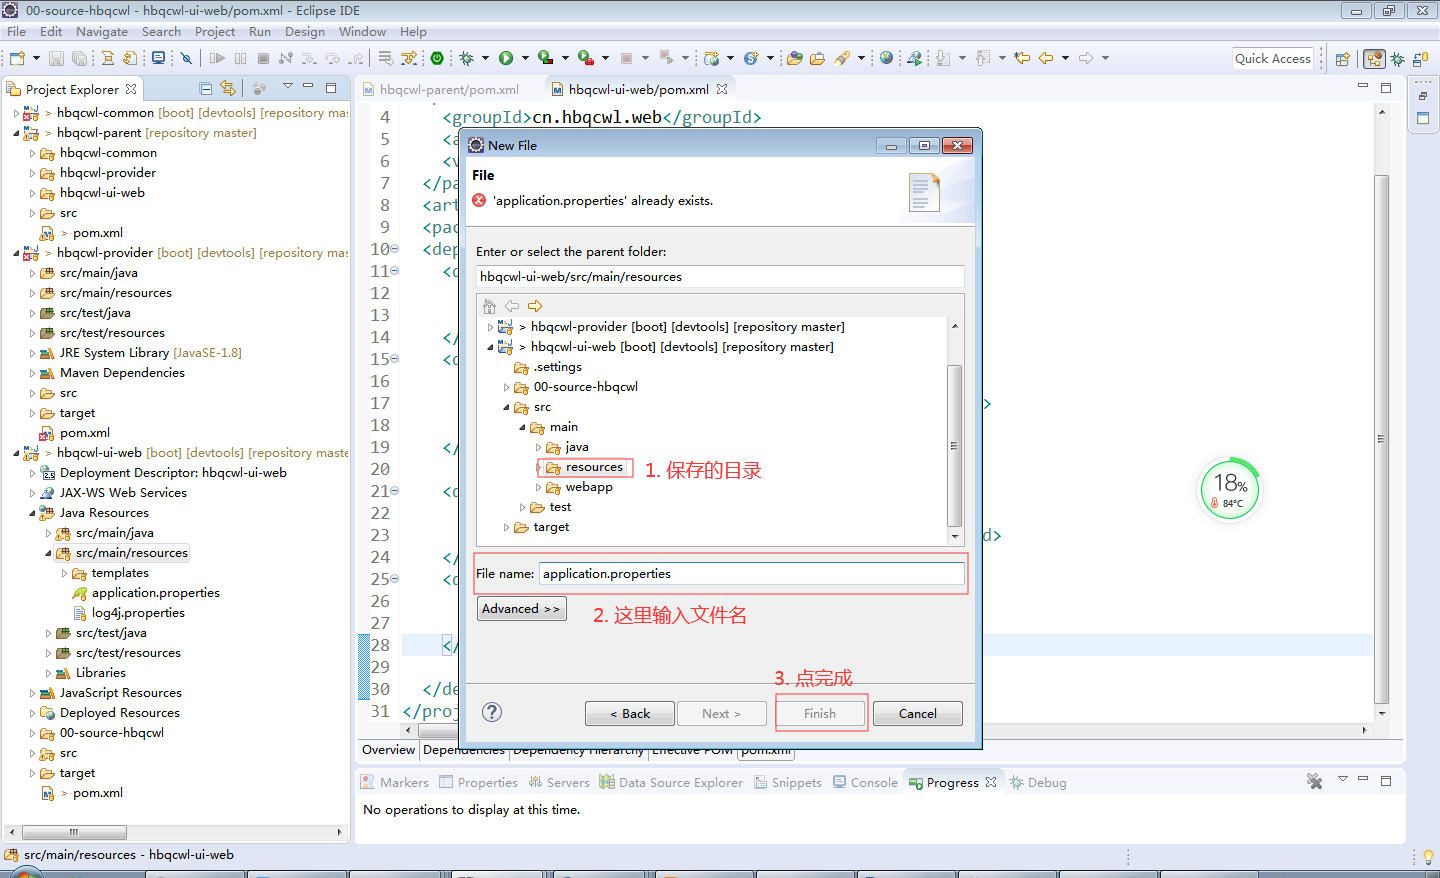
6. 添加application.properties 的资源文件
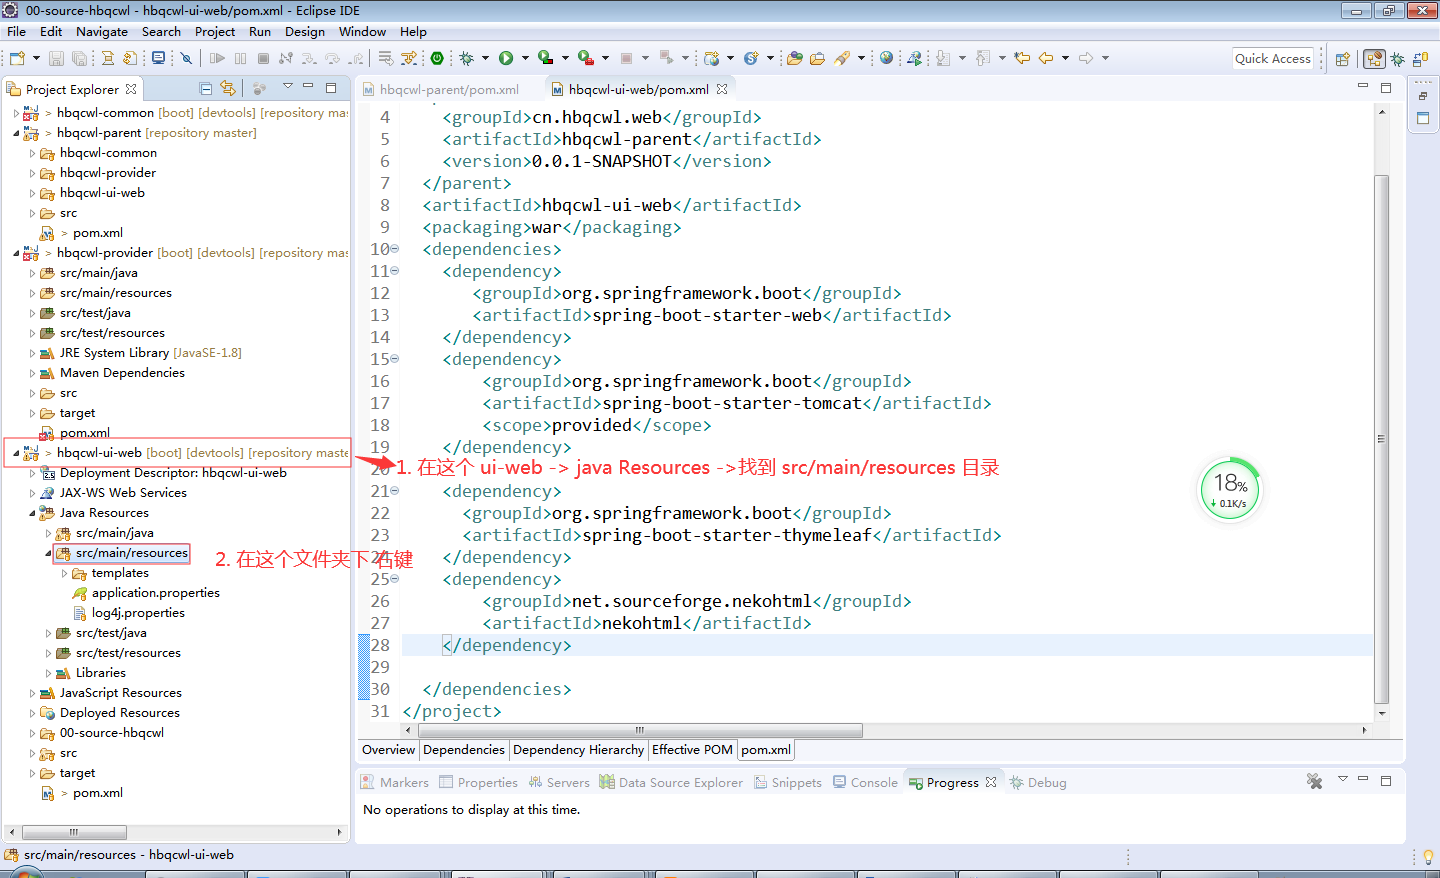
弹出的窗口中选择 file,如下图:
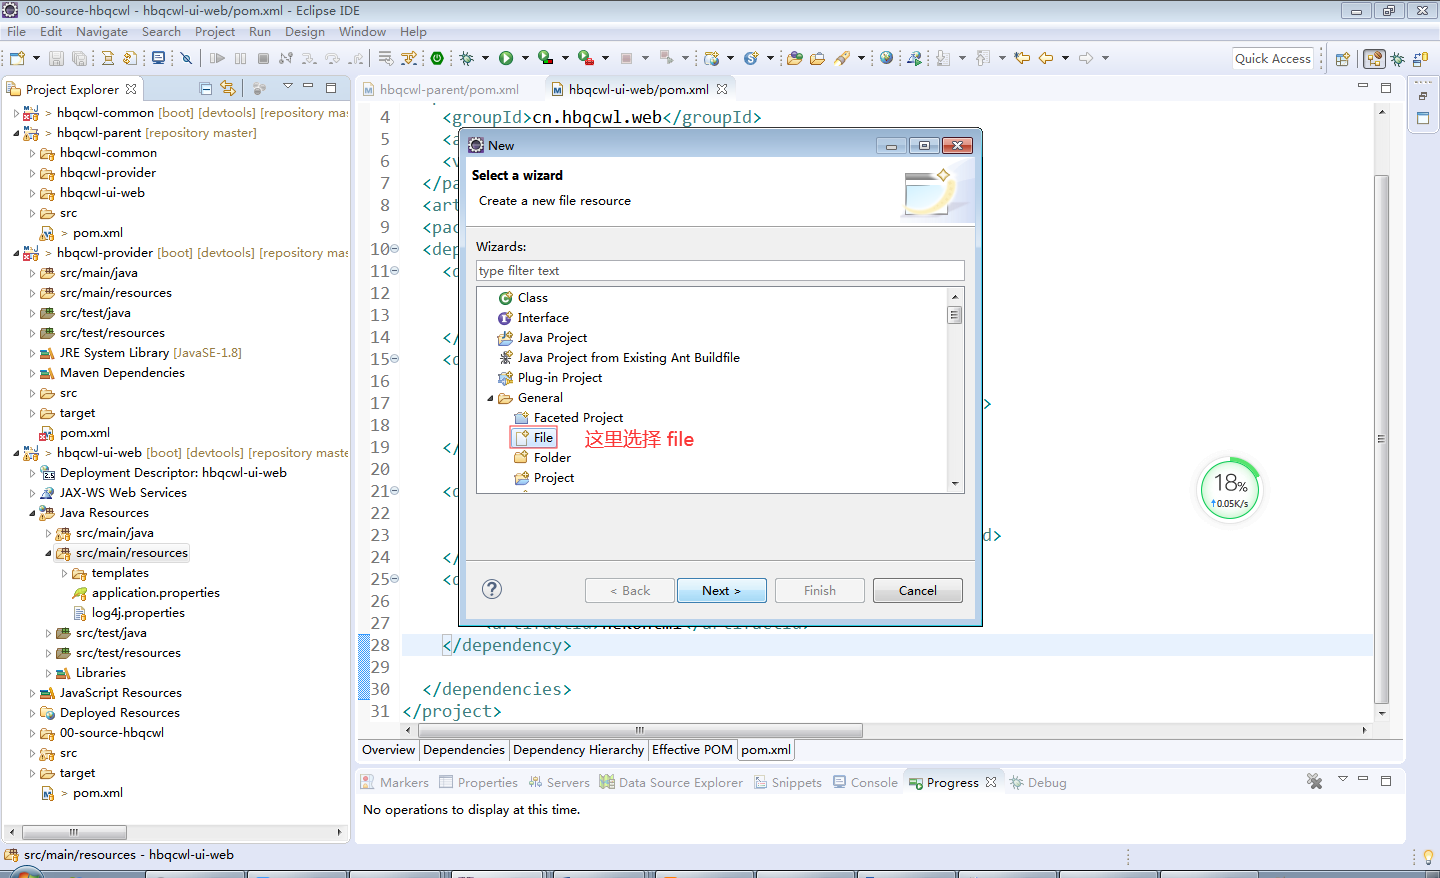
输入文件名为: application.properties
复制下面的内容到文件中,如下图所示:
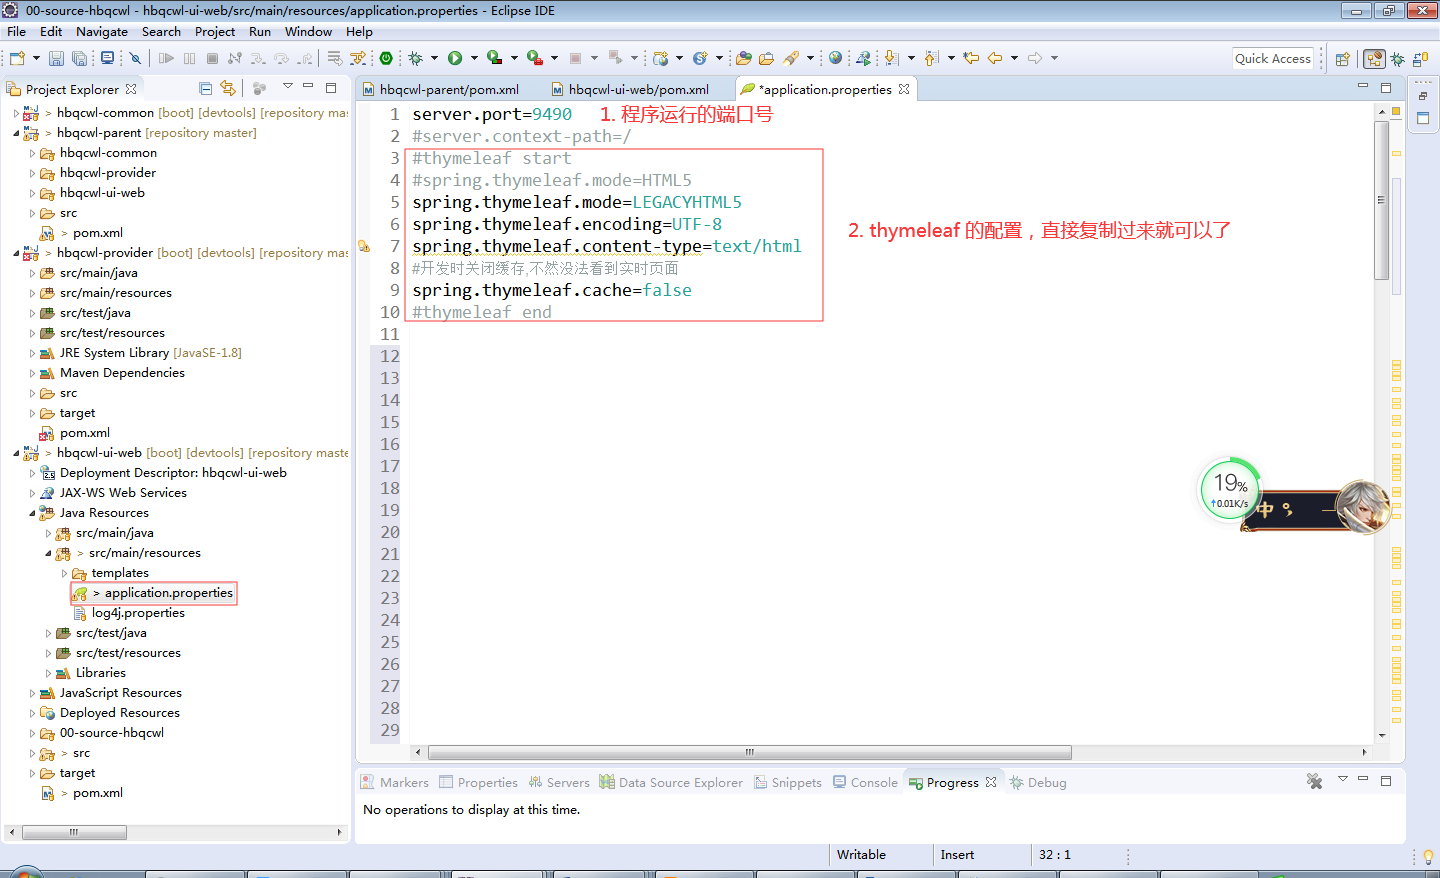
要复制的代码如下:
server.port=9490
#server.context-path=/
#thymeleaf start
#spring.thymeleaf.mode=HTML5
spring.thymeleaf.mode=LEGACYHTML5
spring.thymeleaf.encoding=UTF-8
spring.thymeleaf.content-type=text/html
#开发时关闭缓存,不然没法看到实时页面
spring.thymeleaf.cache=false
#thymeleaf end
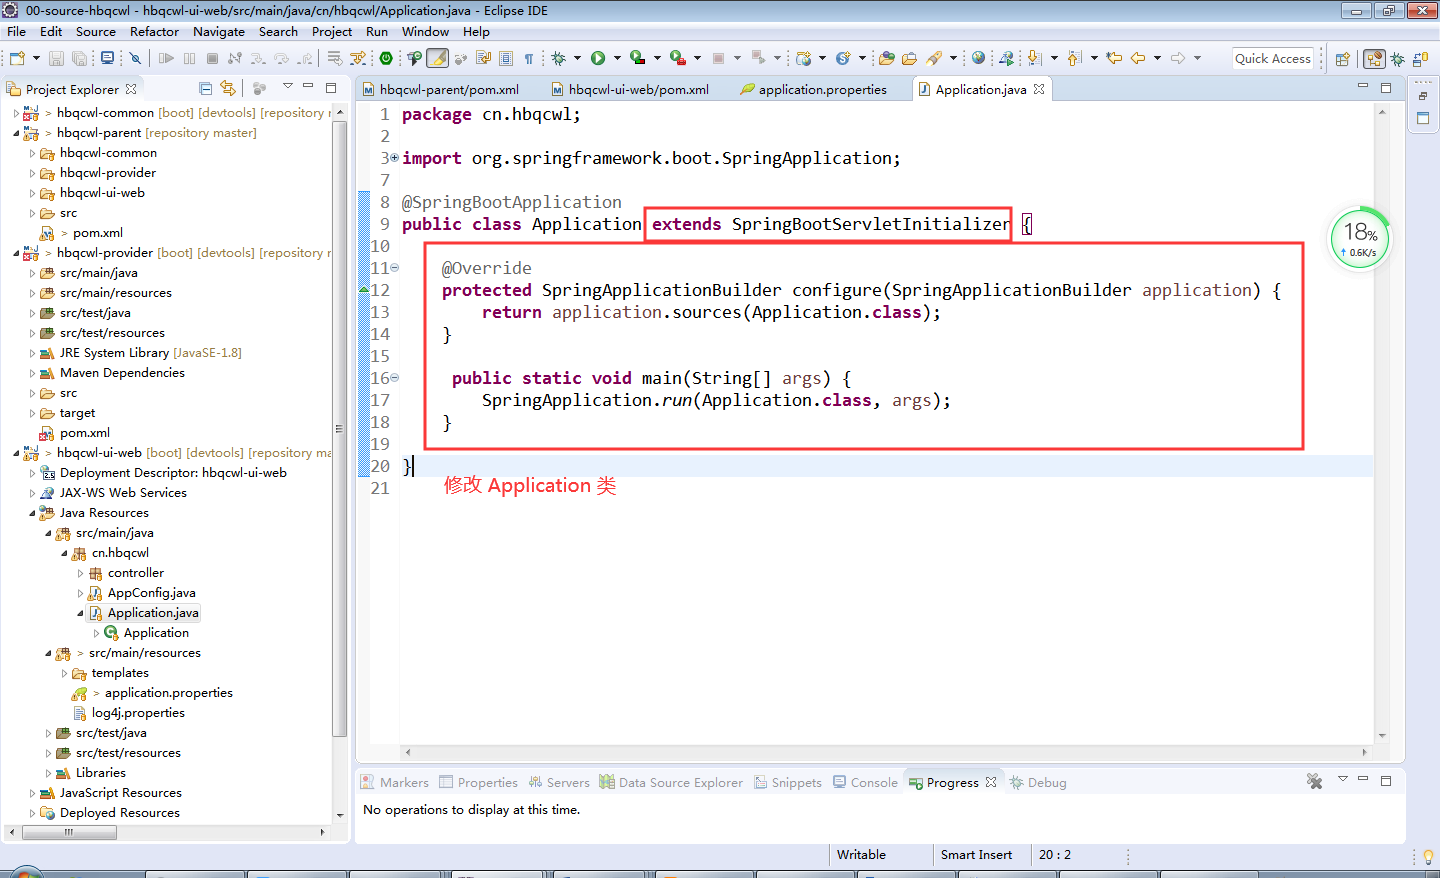
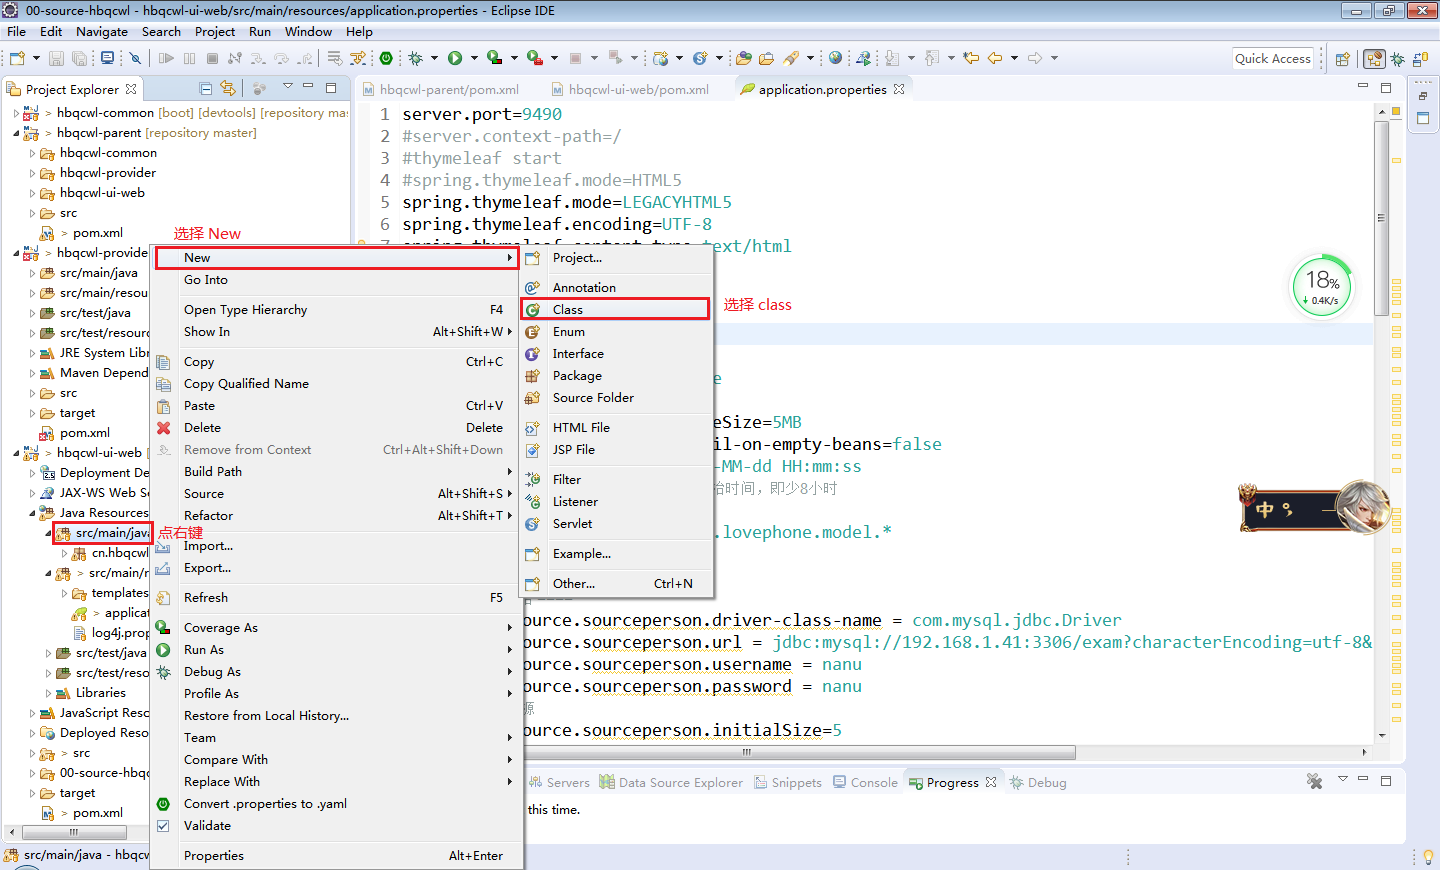
7. 添加程序启动类
添加一个 application 类,用于启动 spring boot。
具体如下图所示:
输入类名: Application,如下图所示
修改类,从 SpringBootServletInitializer 继承过来。如下图所示:
具体代码如下:
@SpringBootApplication
public class Application extends SpringBootServletInitializer {
@Override
protected SpringApplicationBuilder configure(SpringApplicationBuilder application) {
return application.sources(Application.class);
}
public static void main(String[] args) {
SpringApplication.run(Application.class, args);
}
}
全部复制过去就行了。
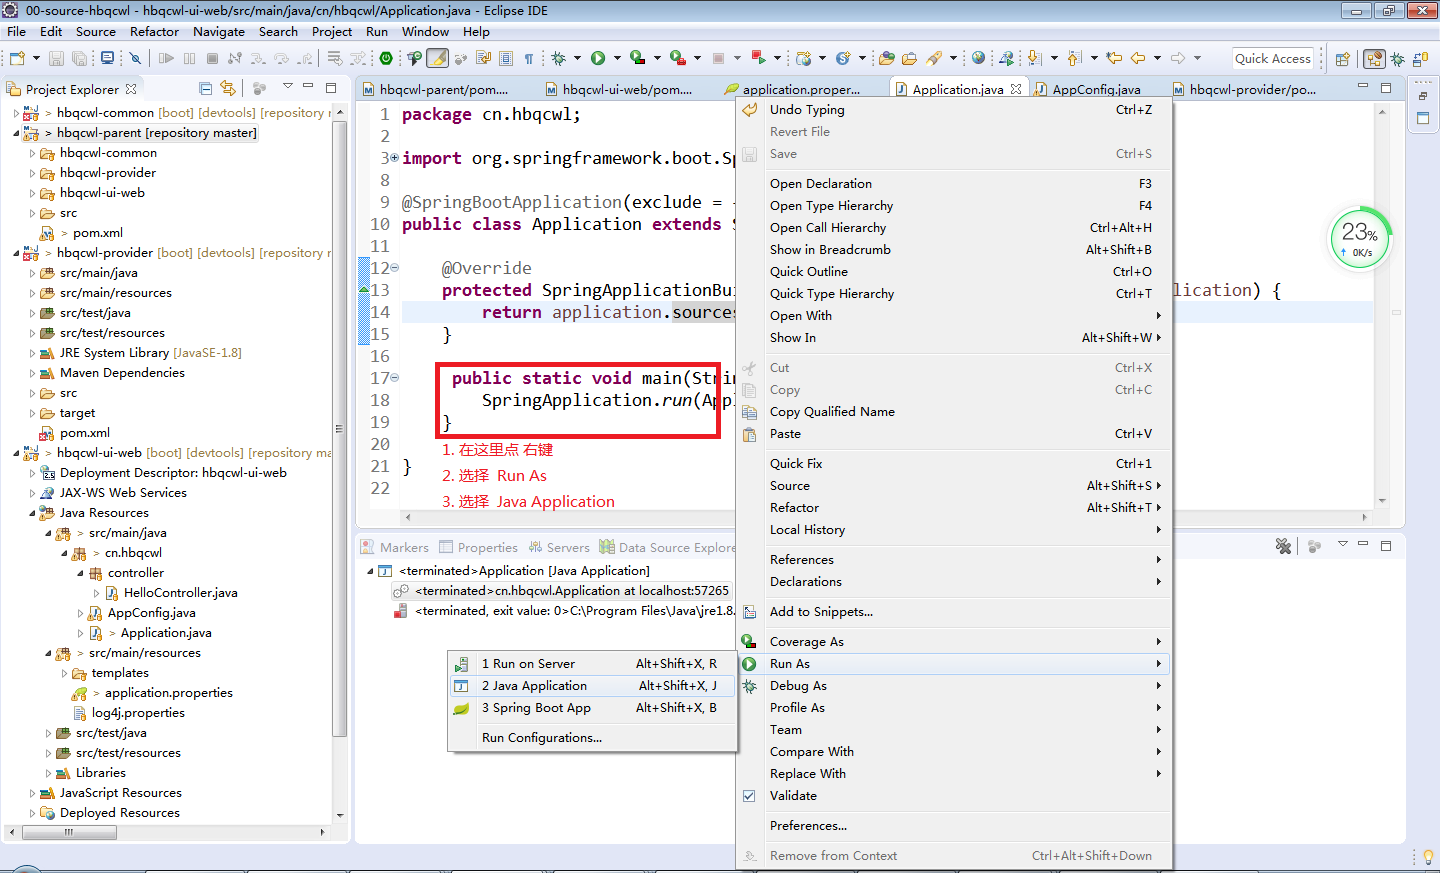
8. 启动 spring boot
至此,配置基本完成,我们启动一下试试能不能正常启动。
具体操作如下图所示:
选择 run as -> java application 后,控制台会输出信息,等到 started application in XXX sesconds 就代表启动成功了。
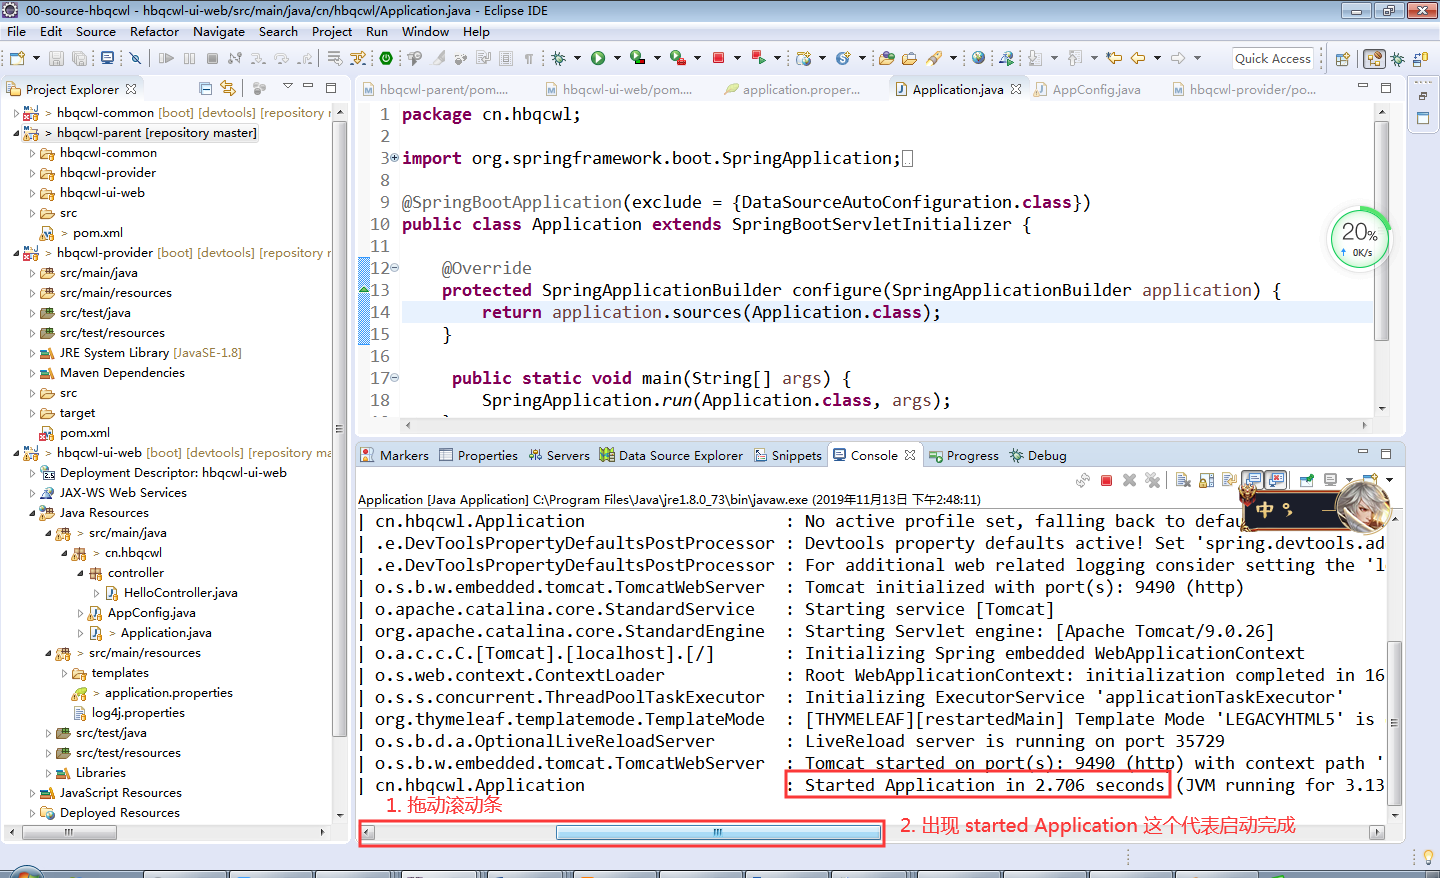
此时 spring boot 已正常启动。因为没有添加页面,所以我们先从控制台中查看是否启动完成。
后面我们学到 thymeleaf 后,添加上页面就可以在浏览器中看到效果了。
 hbqcwl@sina.cn